DR-64
DR-64 (Drum Robot - 64 steps)
This guide will walk you through everything from basic beat-making to advanced synchronization with external gear.
1. Getting Started: Making Your First Beat
The first step is to get the sequencer talking to your MIDI synthesizer, whether it's a piece of hardware or another music app on your computer.
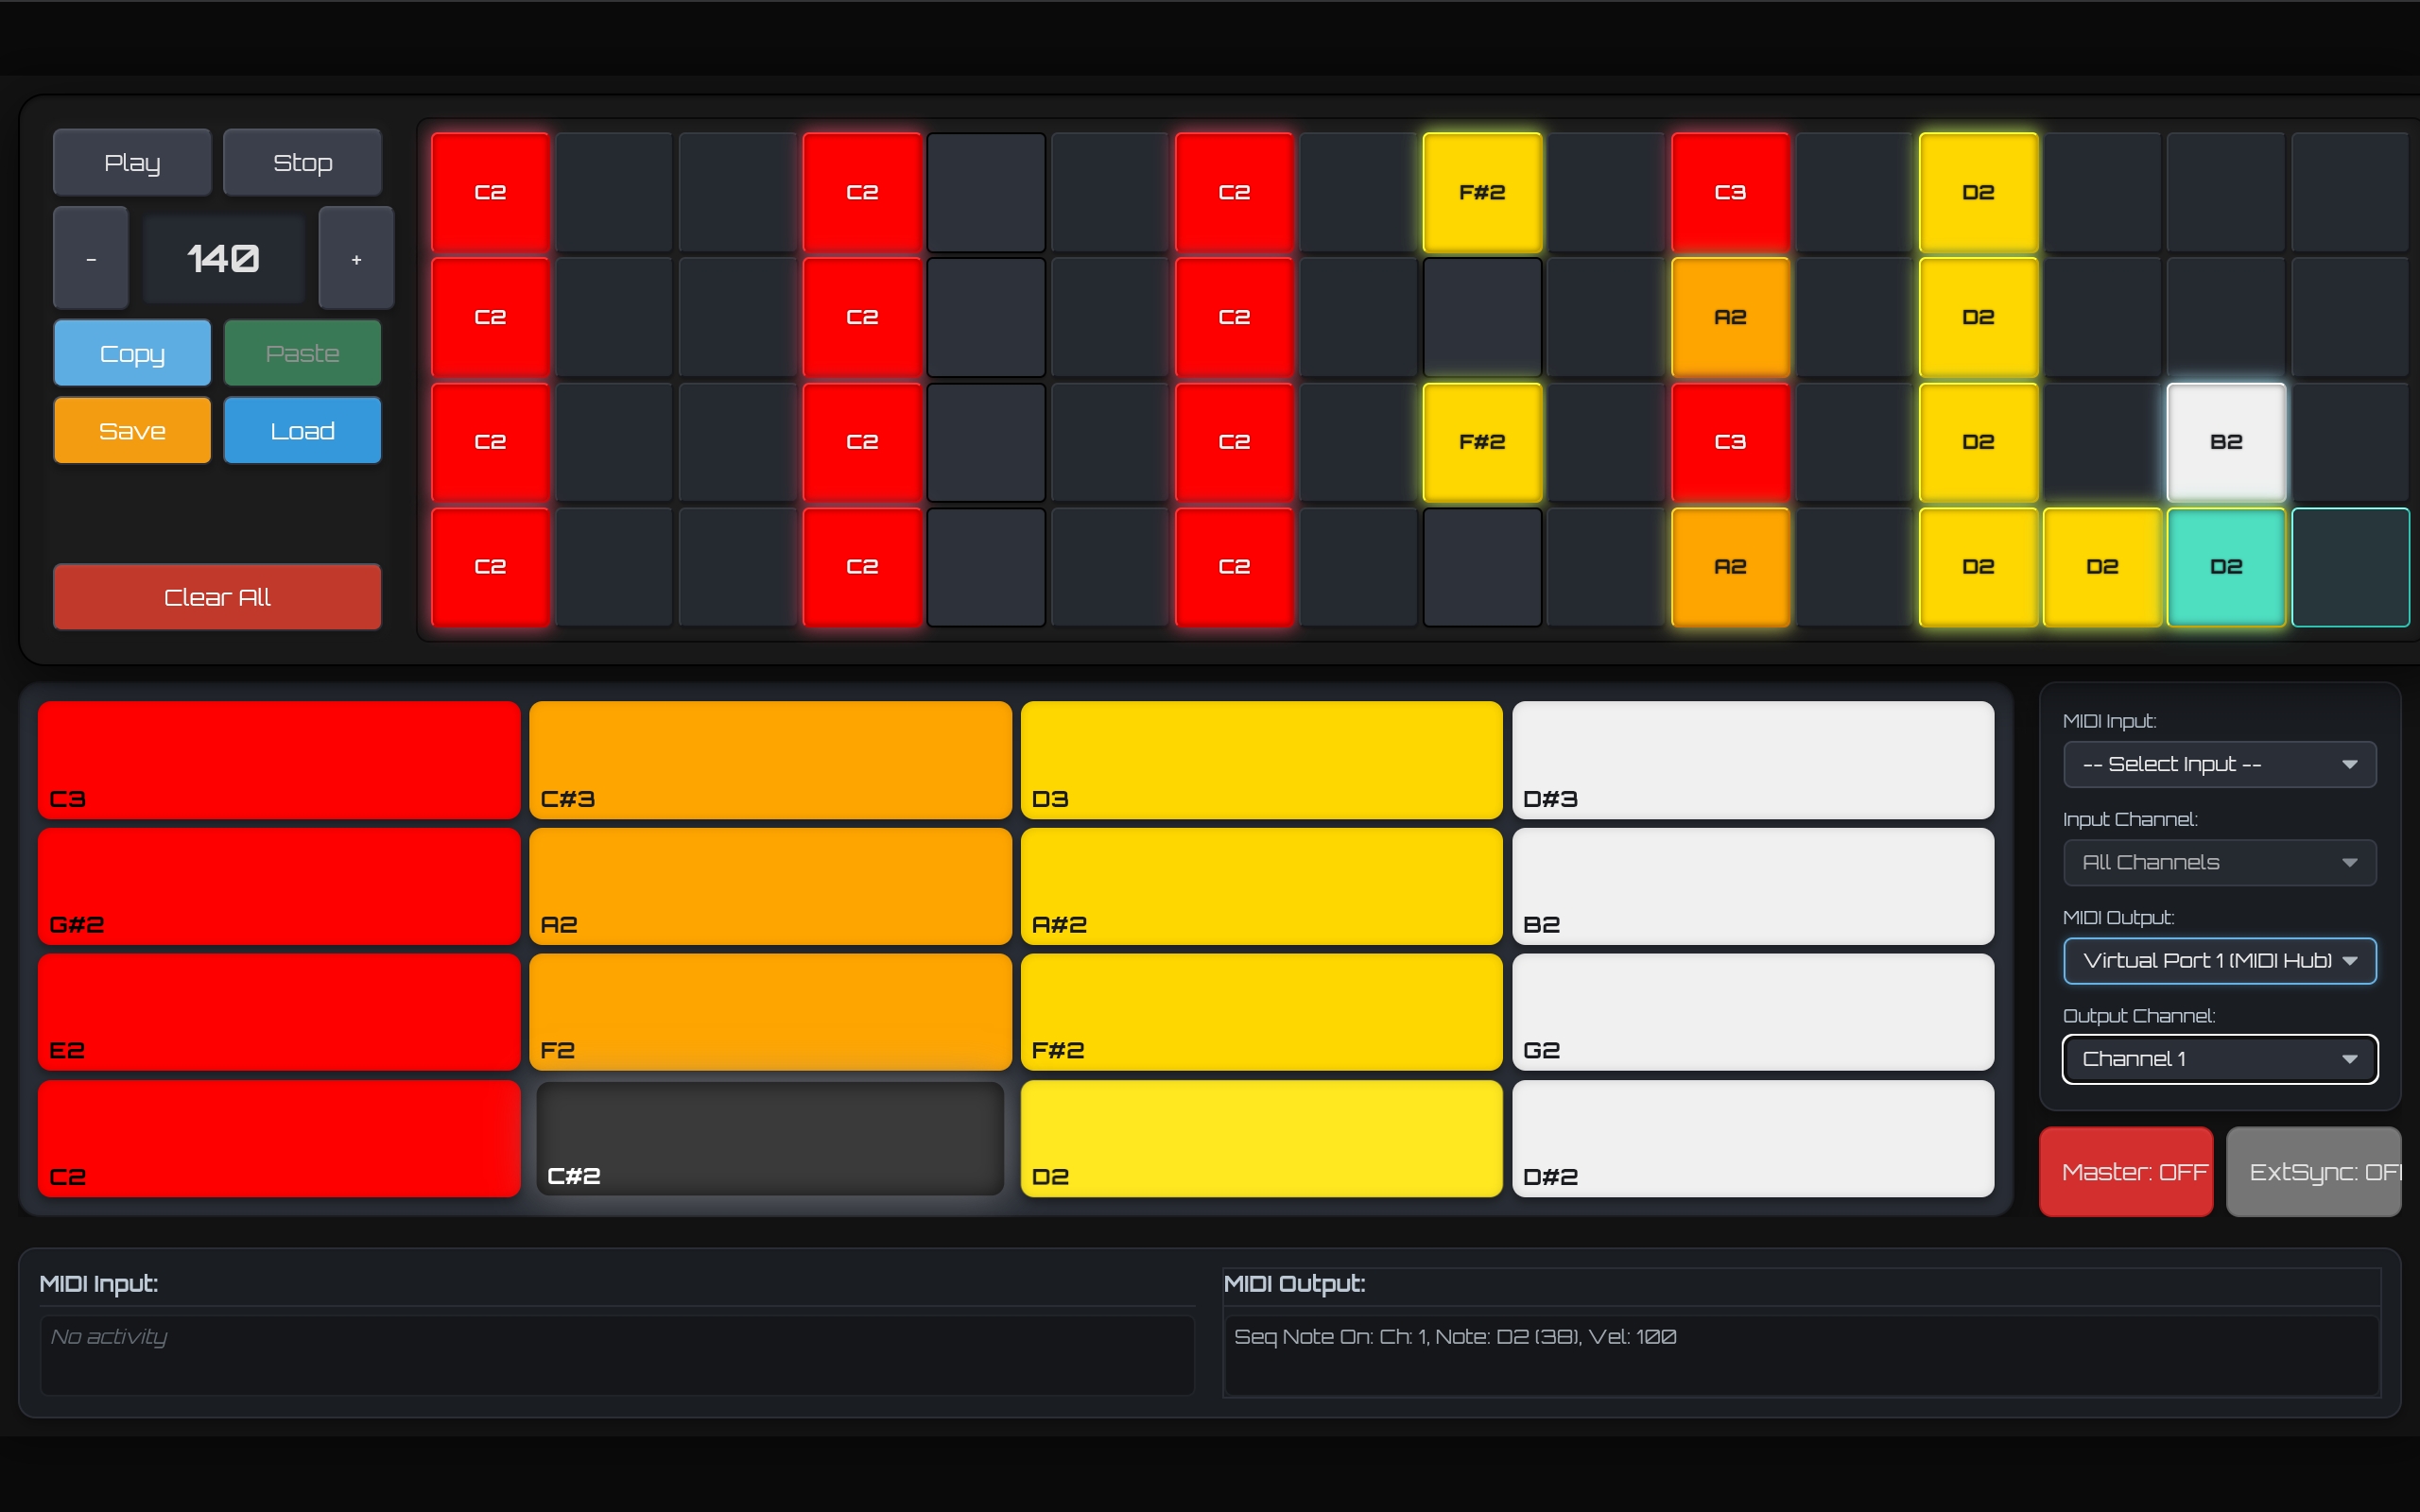
- Connect Your MIDI Gear:
- In the MIDI Setup section, use the dropdown menus to select your desired MIDI Input and MIDI Output devices.
- If your synth is on a specific channel, select it using the Output Channel dropdown. If you're not sure,
Allis a good starting point.
- Arm a Note for Recording:
- The colorful pads in the Midi Pads section represent different notes (like C2, C#2, D2, etc.).
- Click on one of these pads. The Armed Note Display above the main sequencer controls will light up and show which note you've selected. This is the note that will be placed onto the grid.
- Program Your Pattern:
- Click on any of the steps in the main Sequencer Grid. A new block will appear, representing the "armed" note you selected.
- To erase a note, make sure the correct note is "armed," then click the step again. To erase any note regardless of what's armed, arm "None" by clicking the currently armed pad again to deselect it, then click on the steps you want to clear.
- Press Play!
- Hit the Play button in the top-left control panel. The sequencer will start, and you should hear your MIDI synthesizer playing the pattern you just created.
2. Advanced Controls & Performance Features
Once you have a beat going, you can start shaping it in real-time.
- Tempo (BPM) & Loop Length: Use the
+and-buttons or type directly into the BPM and Loop Length displays to change the speed and length of your pattern. - Momentary Loops (Beat Repeats):
- While the sequencer is playing, press and hold one of the Momentary Loop buttons (e.g.,
1/2,1/4,1/8). - The sequencer will immediately start looping a small section of your main pattern, creating a classic "beat repeat" or stutter effect.
- Release the button, and the sequencer will resume playing the main pattern right where it would have been, staying perfectly in time.
- While the sequencer is playing, press and hold one of the Momentary Loop buttons (e.g.,
- Pattern Management (Save & Load):
- Use Copy and Paste to duplicate your current pattern.
- Use Save to store your pattern for later. You'll be prompted to give it a name.
- Use Load to open a list of your saved patterns and switch between them.
- PANIC Button: If your external synthesizer has a "stuck" note that won't turn off, hit the PANIC button. This sends an "All Notes Off" message to your gear, which usually fixes the issue.
3. MIDI Clock Synchronization
This is one of the most powerful features for integrating the sequencer into a larger setup. You can find these controls next to the MIDI Setup section.
- To Make This App the "Master":
- Enable the Internal Clock button.
- Make sure a MIDI Output is selected.
- Press Play in this application.
- Your connected external gear (which should be set to listen for an external MIDI clock) will now start, stop, and follow the tempo of this sequencer.
- To Make This App the "Slave":
- Enable the External Sync button.
- The internal Play/Stop buttons will be disabled.
- Press Play on your external master device (e.g., another sequencer, a drum machine).
- This application will automatically start playing in perfect sync with your master device.
Have fun exploring and making music!
Leave a comment
Log in with itch.io to leave a comment.